{"cells":[{"metadata":{},"cell_type":"markdown","source":"# 👨⚕️ OSIC Pulmonary Fibrosis Progression 👩⚕️\n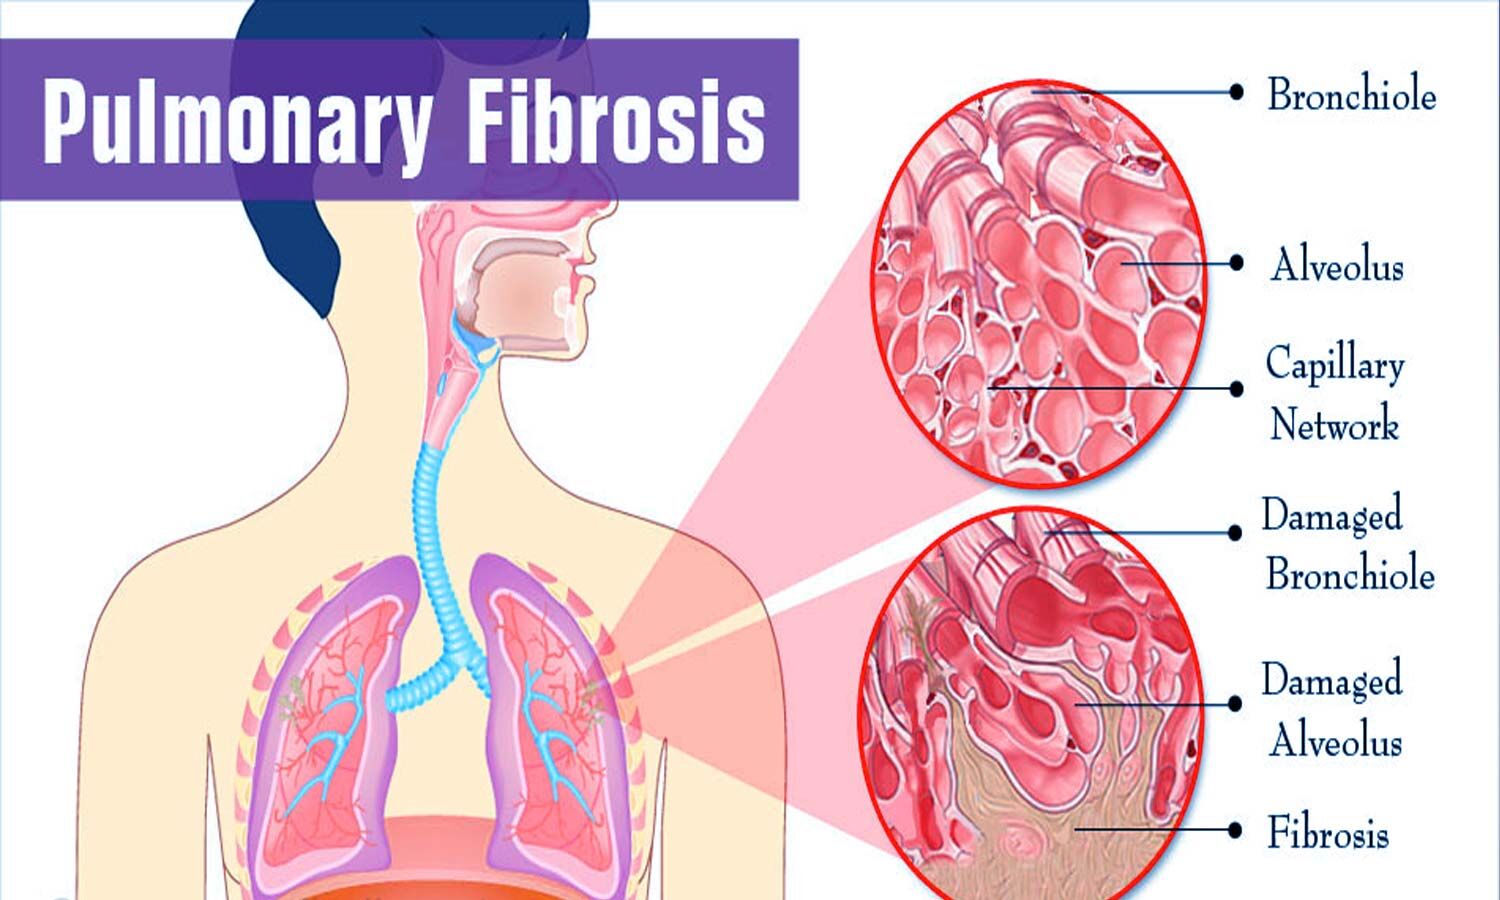","execution_count":null},{"metadata":{},"cell_type":"markdown","source":"### In this notebook, I will show you how to preprocess and prepare both our Tabular and Image datasets.\n\n#### **Disclaimer** : This notebook is a continuation of my [previous notebook](https://www.kaggle.com/sarthak97/osic-starter-eda-dicom-viz-analysis/notebook) on EDA and DICOM data viz. and analysis. Make sure to check it out to get a better understanding.","execution_count":null},{"metadata":{"_uuid":"8f2839f25d086af736a60e9eeb907d3b93b6e0e5","_cell_guid":"b1076dfc-b9ad-4769-8c92-a6c4dae69d19","trusted":true},"cell_type":"code","source":"# Importing relevant packages\nimport pandas as pd \nimport numpy as np\nimport matplotlib.pyplot as plt\nfrom sklearn.preprocessing import StandardScaler","execution_count":null,"outputs":[]},{"metadata":{},"cell_type":"markdown","source":"# _1. Tabular Data Preprocessing + Preperation_ 🛠️","execution_count":null},{"metadata":{},"cell_type":"markdown","source":"## _1.1 Train Data_","execution_count":null},{"metadata":{"_uuid":"d629ff2d2480ee46fbb7e2d37f6b5fab8052498a","_cell_guid":"79c7e3d0-c299-4dcb-8224-4455121ee9b0","trusted":true},"cell_type":"code","source":"train_df = pd.read_csv('../input/osic-pulmonary-fibrosis-progression/train.csv')\ntrain_df.head()","execution_count":null,"outputs":[]},{"metadata":{"trusted":true},"cell_type":"code","source":"train_df.shape","execution_count":null,"outputs":[]},{"metadata":{"trusted":true},"cell_type":"code","source":"train_df.describe()","execution_count":null,"outputs":[]},{"metadata":{},"cell_type":"markdown","source":"#### We have seen in the [previous notebook](https://www.kaggle.com/sarthak97/osic-starter-eda-dicom-viz-analysis/notebook) that there are no missing values in train set. So no need to check again.","execution_count":null},{"metadata":{},"cell_type":"markdown","source":"### Since 'Patient' feature contains only the unique ID of patient, we can remove it from our dataset.","execution_count":null},{"metadata":{"trusted":true},"cell_type":"code","source":"# Create checkpoint before deleting 'patient' feature\noriginal_df = train_df.copy()\n\n# Delete the feature now\ntrain_df = train_df.drop(['Patient'], axis=1)\ntrain_df.head()","execution_count":null,"outputs":[]},{"metadata":{},"cell_type":"markdown","source":"### Let's handle the categorical variables now...\n\n**To do this, we would be using the 'get_dummies' method of pandas which will one-hot encode the categorical variables and remove extra features to avoid dummy variable trap.**","execution_count":null},{"metadata":{"trusted":true},"cell_type":"code","source":"# Create a checkpoint\ndf_without_patient = train_df.copy()\n\n# Convert the categorical variables now...\ntrain_df = pd.get_dummies(train_df, drop_first=True)\ntrain_df.head()","execution_count":null,"outputs":[]},{"metadata":{},"cell_type":"markdown","source":"### From above dataframe head, all values are now numerical. It is clear that some values are really big while others are small. \n\n**This is a problem as our Machine Learning algorithm may find out a relation between the result and the higher and lower values in such a way that it considers higher values to be of more importance than the lower ones which is totally not the case. So, we need to handle such a thing.**\n\nWe can do so by **Scaling** our dataset so that each feature value is in the same range","execution_count":null},{"metadata":{"trusted":true},"cell_type":"code","source":"# Create a checkpoint\ndf_with_dummies = train_df.copy()\n\n# Now scale each feature in dataframe\nscaler = StandardScaler()\nscaler.fit(train_df)\ntrain_df = scaler.transform(train_df)\ntrain_df","execution_count":null,"outputs":[]},{"metadata":{},"cell_type":"markdown","source":"'train_df' now contains all scaled values and is a 2D numpy array.","execution_count":null},{"metadata":{"trusted":true},"cell_type":"code","source":"# Convert numpy array into dataframe\nfinal_train_df = pd.DataFrame(train_df)\n\n# get column headers from checkpoint df\ncol_names = df_with_dummies.columns\n\n# Set column headers in final dataframe\nfinal_train_df.columns = col_names\n\nfinal_train_df.head()","execution_count":null,"outputs":[]},{"metadata":{},"cell_type":"markdown","source":"## _1.2 Test Data_\n### We will be repeating all same steps which we performed above for test data as well","execution_count":null},{"metadata":{"trusted":true},"cell_type":"code","source":"test_df = pd.read_csv('../input/osic-pulmonary-fibrosis-progression/test.csv')\ntest_df.head()","execution_count":null,"outputs":[]},{"metadata":{"trusted":true},"cell_type":"code","source":"test_df.shape","execution_count":null,"outputs":[]},{"metadata":{"trusted":true},"cell_type":"code","source":"test_df.describe()","execution_count":null,"outputs":[]},{"metadata":{},"cell_type":"markdown","source":"#### We have seen in the [previous notebook](https://www.kaggle.com/sarthak97/osic-starter-eda-dicom-viz-analysis/notebook) that there are no missing values in test set also. So no need to check again.","execution_count":null},{"metadata":{},"cell_type":"markdown","source":"### Since 'Patient' feature contains only the unique ID of patient, we can remove it from our dataset.","execution_count":null},{"metadata":{"trusted":true},"cell_type":"code","source":"# Create checkpoint before deleting 'patient' feature\noriginal_test_df = test_df.copy()\n\n# Delete the feature now\ntest_df = test_df.drop(['Patient'], axis=1)\ntest_df.head()","execution_count":null,"outputs":[]},{"metadata":{"trusted":true},"cell_type":"code","source":"# Create a checkpoint\ntest_df_without_patient = test_df.copy()\n\n# Convert the categorical variables now...\ntest_df = pd.get_dummies(test_df, drop_first=True)\ntest_df.head()","execution_count":null,"outputs":[]},{"metadata":{"trusted":true},"cell_type":"code","source":"# Create a checkpoint\ntest_df_with_dummies = test_df.copy()\n\n# Now scale each feature in dataframe\nscaler = StandardScaler()\nscaler.fit(test_df)\ntest_df = scaler.transform(test_df)\ntest_df","execution_count":null,"outputs":[]},{"metadata":{"trusted":true},"cell_type":"code","source":"# Convert numpy array into dataframe\nfinal_test_df = pd.DataFrame(test_df)\n\n# get column headers from checkpoint df\ncol_names = test_df_with_dummies.columns\n\n# Set column headers in final dataframe\nfinal_test_df.columns = col_names\n\nfinal_test_df.head()","execution_count":null,"outputs":[]},{"metadata":{},"cell_type":"markdown","source":"### _(Optional) You can run below cell and download the final csv data if you want which will be a ready-to-use data helpful when we create our baseline model_","execution_count":null},{"metadata":{"trusted":true},"cell_type":"code","source":"final_train_df.to_csv('final_train.csv', index=False)\nfinal_test_df.to_csv('final_test.csv', index=False)\n'''\n1.Hit commit and run at the right hand corner of the kernel.\n2.Wait till the kernel runs from top to bottom.\n3.Checkout the 'Output' Tab from the Version tab. Or go to the snapshot of your kernel and checkout the 'Output' tab.\n Your csv file will be there!!\n4. Download it.\n'''","execution_count":null,"outputs":[]},{"metadata":{},"cell_type":"markdown","source":"\n# _2. Image Data Preprocessing_ 📸","execution_count":null},{"metadata":{},"cell_type":"markdown","source":"**Background**: When we deal with images in image-based problems and deploy a deep learning solution, it is better to have a fast image reading and transforming library. I will be converting DICOM images to numpy arrays just to make the process of preprocessing a lot simpler along with OpenCV.","execution_count":null},{"metadata":{"trusted":true},"cell_type":"markdown","source":"### Below are the steps that can be performed in general to preprocess your image dataset.\n\n#### _NOTE : I will be showing this on one image just to demonstrate how you can implement this in your notebooks._","execution_count":null},{"metadata":{"trusted":true},"cell_type":"code","source":"!pip install imutils","execution_count":null,"outputs":[]},{"metadata":{},"cell_type":"markdown","source":"I am uisng imutils package here as the methods it contains are pretty simple and easy to use.","execution_count":null},{"metadata":{"trusted":true},"cell_type":"code","source":"# Importing relevant packages\n\nimport os\nimport cv2\nimport glob\nimport imutils\nimport pydicom\nimport matplotlib.pyplot as plt\n%matplotlib inline","execution_count":null,"outputs":[]},{"metadata":{"trusted":true},"cell_type":"code","source":"# Convert .dcm image to .png image\n\npath = '../input/osic-pulmonary-fibrosis-progression/train/ID00007637202177411956430/1.dcm'\nfile = path.split('/')[-1]\noutdir = './'\n\n# read dcm file\ndcm_img = pydicom.dcmread(path)\n\n# get pixel arrays, replace .dcm extension with .png and place image in output directory\nimg = dcm_img.pixel_array\ncv2.imwrite(outdir + file.replace('.dcm','.png'),img)","execution_count":null,"outputs":[]},{"metadata":{"trusted":true},"cell_type":"code","source":"image = cv2.imread(\"./1.png\")\nplt.imshow(image)","execution_count":null,"outputs":[]},{"metadata":{},"cell_type":"markdown","source":"## _2.1 Blur Image_","execution_count":null},{"metadata":{"trusted":true},"cell_type":"code","source":"# Gaussian Blur\nblur = cv2.GaussianBlur(image, (7,7), 0)\nplt.imshow(blur)","execution_count":null,"outputs":[]},{"metadata":{"trusted":true},"cell_type":"code","source":"# Median Blur\nmedian_blur = cv2.medianBlur(image, 5)\nplt.imshow(median_blur)","execution_count":null,"outputs":[]},{"metadata":{},"cell_type":"markdown","source":"## _2.2 Flip Image_\nThe image is flipped according to the value of flipCode as follows:\n\n- flipcode = 0: flip vertically\n- flipcode > 0: flip horizontally\n- flipcode < 0: flip vertically and horizontally","execution_count":null},{"metadata":{"trusted":true},"cell_type":"code","source":"# Flip vertically \nflip_vertical = cv2.flip(image, flipCode=0)\nplt.imshow(flip_vertical)","execution_count":null,"outputs":[]},{"metadata":{"trusted":true},"cell_type":"code","source":"# Flip horizontally \nflip_horizontal = cv2.flip(image, flipCode=1)\nplt.imshow(flip_horizontal)","execution_count":null,"outputs":[]},{"metadata":{"trusted":true},"cell_type":"code","source":"# Flip both horizontally and vertically\nflip_both = cv2.flip(image, flipCode=-1)\nplt.imshow(flip_both)","execution_count":null,"outputs":[]},{"metadata":{},"cell_type":"markdown","source":"## _2.3 Edge Detection_","execution_count":null},{"metadata":{"trusted":true},"cell_type":"code","source":"edged = cv2.Canny(image, 100, 200)\nplt.imshow(edged)","execution_count":null,"outputs":[]},{"metadata":{},"cell_type":"markdown","source":"## _2.4 Rotating an image_\n\nFollowing standard is used in imutils package when rotating an image\n\n- Angle > 0 -> Counter clockwise\n- Angle < 0 -> Clockwise","execution_count":null},{"metadata":{"trusted":true},"cell_type":"code","source":"# clockwise rotation\nrotate_clock = imutils.rotate(image, -45)\nplt.imshow(rotate_clock)","execution_count":null,"outputs":[]},{"metadata":{"trusted":true},"cell_type":"code","source":"# counter clockwise rotation\nrotate_counter = imutils.rotate(image, 90)\nplt.imshow(rotate_counter)","execution_count":null,"outputs":[]},{"metadata":{},"cell_type":"markdown","source":"## _2.5 Thresholding an image_","execution_count":null},{"metadata":{"trusted":true},"cell_type":"code","source":"_, thresh1 = cv2.threshold(image, 200, 255, cv2.THRESH_BINARY)\nplt.imshow(thresh1)","execution_count":null,"outputs":[]},{"metadata":{"trusted":true},"cell_type":"code","source":"_, thresh2 = cv2.threshold(image, 200, 255, cv2.THRESH_BINARY_INV)\nplt.imshow(thresh2)","execution_count":null,"outputs":[]},{"metadata":{},"cell_type":"markdown","source":"## _2.6 Erosion and Dilation_\nErosion and Dilation are operations of Morphological Transformations.\n\nWhile **Erosion** is helpful in removing white noise (Always try to keep foreground in white), **Dilation** is useful in image binding and joining broken parts of an object.\n\nNormally, in cases like noise removal, erosion is followed by dilation. Because, erosion removes white noises, but it also shrinks our object. So we dilate it. Since noise is gone, they won’t come back, but our object area increases.","execution_count":null},{"metadata":{"trusted":true},"cell_type":"code","source":"# Erosion\nerode = cv2.erode(thresh1, (5,5), iterations=1)\nplt.imshow(erode)","execution_count":null,"outputs":[]},{"metadata":{"trusted":true},"cell_type":"code","source":"dilate = cv2.dilate(thresh1, (5,5), iterations=1)\nplt.imshow(dilate)","execution_count":null,"outputs":[]},{"metadata":{},"cell_type":"markdown","source":"### If you find this notebook useful, please **UPVOTE** it 😊. It keeps me motivated to do more hard work and produce and bring out more quality content for everyone.","execution_count":null}],"metadata":{"kernelspec":{"language":"python","display_name":"Python 3","name":"python3"},"language_info":{"pygments_lexer":"ipython3","nbconvert_exporter":"python","version":"3.6.4","file_extension":".py","codemirror_mode":{"name":"ipython","version":3},"name":"python","mimetype":"text/x-python"}},"nbformat":4,"nbformat_minor":4}